Have you ever get bored of creating a new email address for every new Apple sandbox account?
How did you feel when you realize that you cannot invite a sandbox user again if you deleted it accidentally?
What if you want to test the “Ask to Buy” feature and you need a child sandbox account?
How about testing interrupted purchases?
Suppose you ever struggle with testing the payment flow of your iOS game with the Apple sandbox environment. In that case, this blog post can help you to make the testing process smoother with StoreKit configuration files.
I’m Seref, Software Engineer at the Core team in InnoGames, and I would like to introduce a new way of testing in-app purchases for iOS games in this blog post.
At InnoGames, we have an internal payment module as a native iOS package and a native plugin for Unity. Since it is a shared package for many games we have, it is used by many of our players, which makes it challenging to cover all edge scenarios.
I would like to describe the testing process for the Apple sandbox environment shortly. Then I will give a more detailed explanation to set up a local testing environment with StoreKit and Xcode.
If you are already familiar with the sandbox environment, you can skip to Test with Xcode Using StoreKit Configuration Files section.
Test with Apple Sandbox Environment
If you decided to test your game’s in-app purchases, the first thing you need to do is create a sandbox tester account from App Store Connect. At this step, you need a new email if you already have an Apple account with your email since Apple request an email that is not registered before.
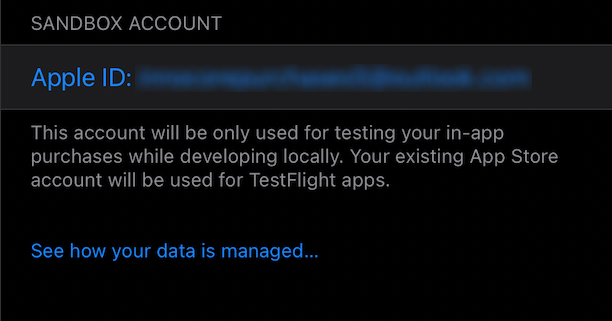
After creating the tester account, you can start testing your game. If it is the first time that you will test in-app purchases, you will be prompt to enter your username/password while you are paying. However, if it is not the first time, you should see your sandbox account information on the Settings App Store menu at the bottom of the screen for iOS versions 12 or later. If you want to test on a device with iOS version 11 or earlier, you need to switch the existing account logged into App Store to a sandbox account.
You can already start making purchases in your game with this account. In general, testing with a sandbox environment is pretty straightforward until you want to test more specific scenarios such as Interrupted Purchases, Deferred Purchases, or subscriptions.
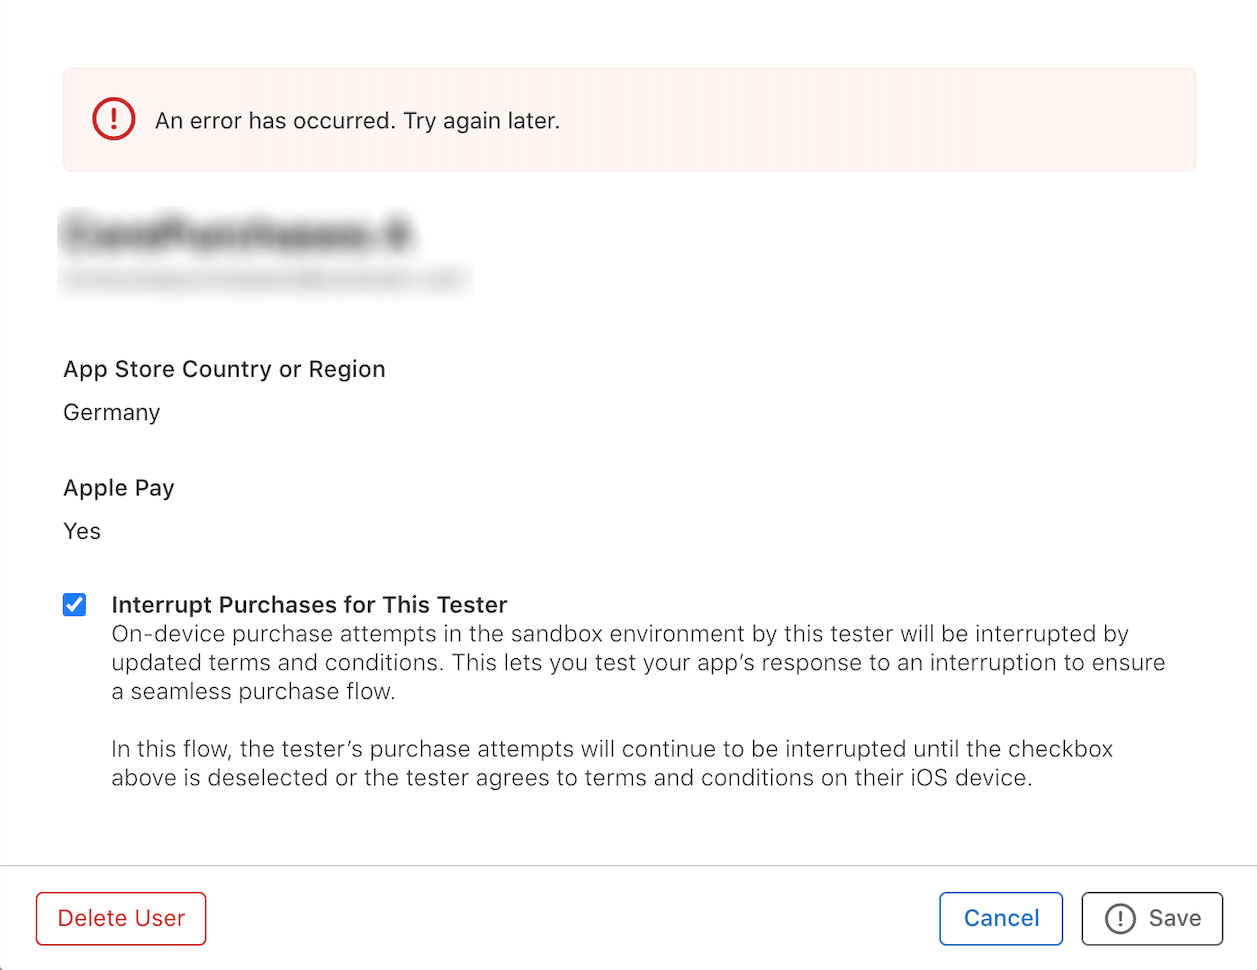
For example, if you want to test interrupted purchases, you need to select the checkbox on the test account details from App Store Connect. When you select it, you will produce an interrupted purchase in your game, and you should see an updated terms and conditions popup during your payment. Suppose you are still in a development phase or you have a bug about this flow. In that case, this can be quite a hassle because each time you want to reproduce an interrupted purchase, you have to select this checkbox again since it is noted that it will be automatically deselected if you agree to the updated terms and conditions. Sadly, it is also possible that when you select the checkbox and try to save it, you will get an error which can be a blocker for your day.
Or you might want to test the Ask to Buy feature to get some deferred purchases on your game so that you can see how your game handles purchases that will be approved at a random time when parents approve their kid’s purchase request. Managing this flow can be especially important if the target audience of your game is kids. However, testing deferred purchases can get even trickier because I cannot reproduce a full deferred purchase flow on the sandbox environment yet. According to Apple, there is one way to reproduce it programmatically using simulatesAskToBuyInSandbox property from SKMutablePayment class; however, if you don’t have a native plugin that handles your in-app purchases, this might not be an option for you.
There was another option that I tried was creating a child sandbox tester account. Sounds interesting, right?
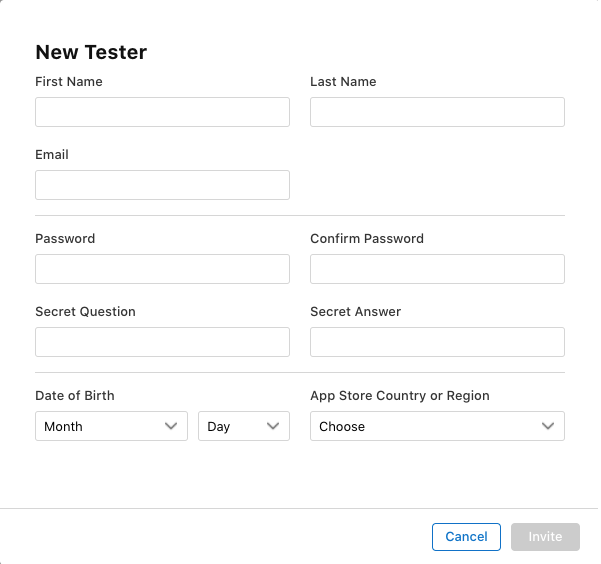
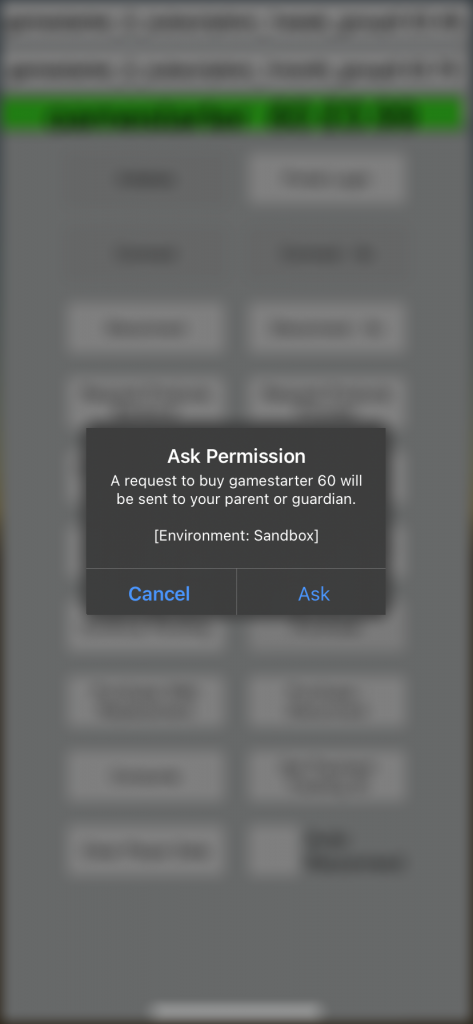
For this purpose, you have to have an account that is not a child account, and you should enable Family Sharing for this account. Then, you should create a new account that will be a child account, but you have to set its birth year later on since Apple does not ask for a birth year during tester creation, as you can see from the screenshot above. You have to add this child account to the family sharing of the other account and enable Ask to Buy for the child account. However, I don’t suggest you do this because even after this setup or enabling simulatesAskToBuyInSandbox property, I could not get a notification for the parent account to approve the purchase means I couldn’t test the whole flow. Still, I was only able to see the pop-up asking permission for purchase until I found the solution of the StoreKit configurations.
Test with Xcode Using StoreKit Configuration Files
After struggling with the sandbox environment and having many issues affecting productivity, I realized that StoreKit has a new feature that helps you to simulate App Store Connect locally with the Xcode. It provides a local environment for testing your in-app purchases without needing to connect to App Store servers.
I want to share how you can set up a test environment, create a StoreKit configuration file, and manage purchases locally.
Set Up Xcode Project
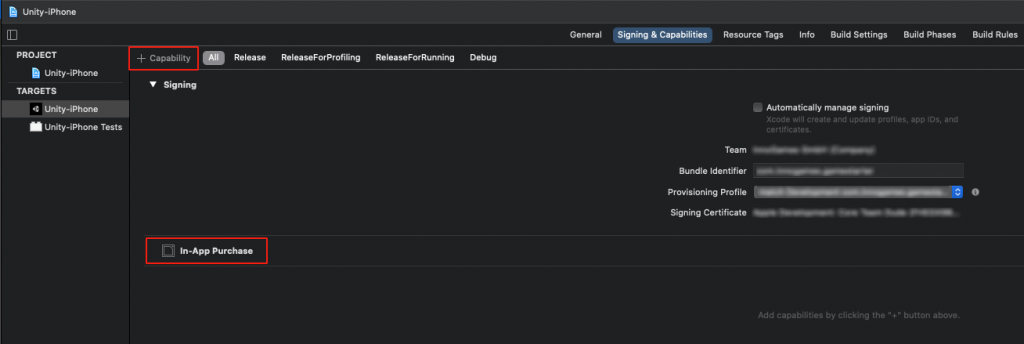
When you build the iOS project from Unity, In-App Purchase capability may be missing in the native project configuration. Therefore, you have to make sure that In-App Purchase capability is added under the Signing & Capabilities tab.
If you build the Unity project for the iOS simulator, you will not see the Signing & Capabilities tab. To see it, you should select the “iOS” for Base SDK in the Build Settings tab. After selecting it, Xcode does not update the tabs automatically. Therefore, selecting one of the other targets on the left menu, such as “Unity-iPhone Tests” and returning to the “Unity-iPhone” target should fix the problem. Since you can select the Signing & Capabilities tab now, you can add the capability as I described above.

Configure and Enable StoreKit Configuration File
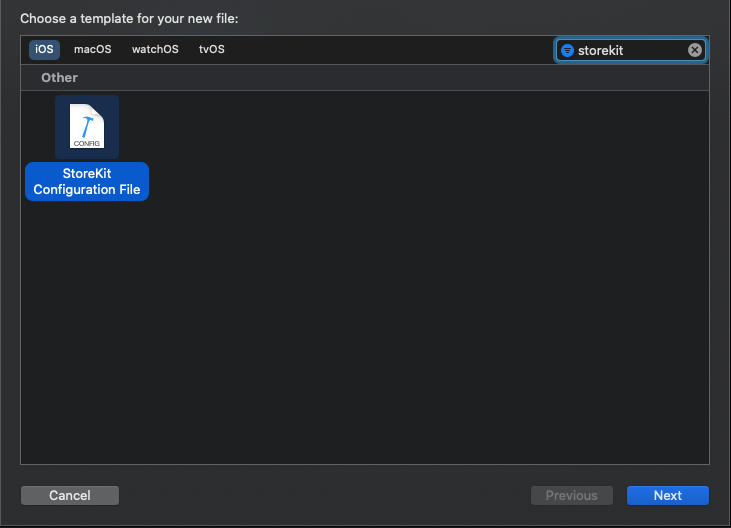
You need to create a new StoreKit configuration file to set up your local App Store Connect.
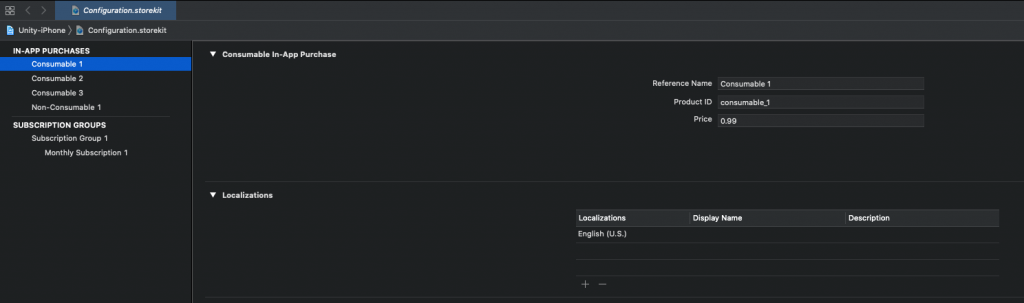
Since you have the configuration file now, you can start defining products. Just like, App Store Connect, there are three options for the products:
- Consumable
- Non-Consumable
- Auto-Renewable Subscription
It is crucial to keep the same productIds as from App Store Connect if you fetch productIds from another source, such as your backend. Otherwise, you will try to fetch different products from your configuration file, which could cause empty product lists. Configuration files allow you to set prices and different localizations for your products. Unlike App Store Connect, there aren’t predefined price tiers. Thus you can choose whatever price you want. Besides, you can set introductory or promotional offers for your subscriptions.
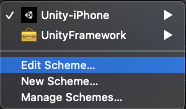
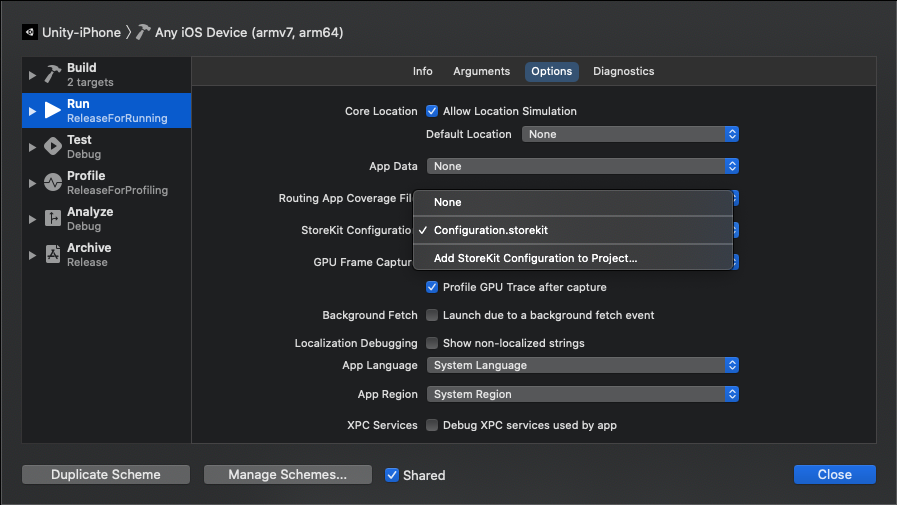
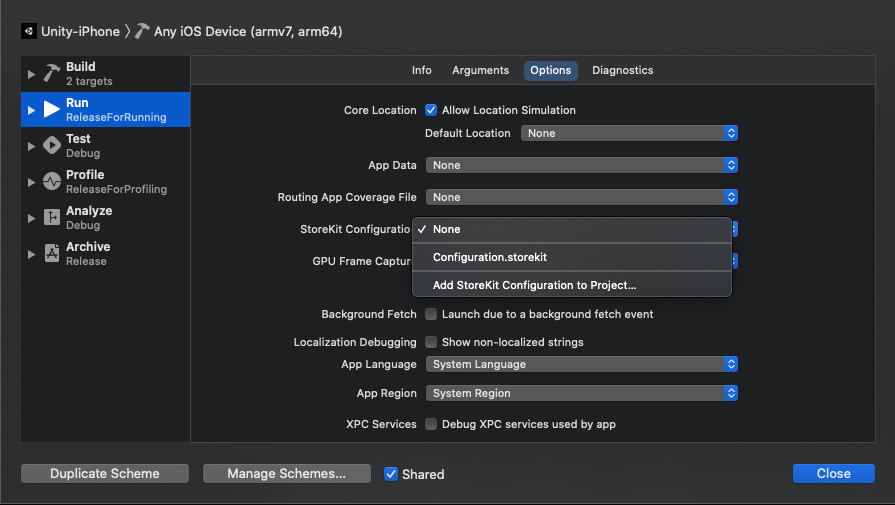
After setting up the configuration file, you have to edit the scheme and set the StoreKit configuration file you created from the Run → Options menu. After this point, if you run the game, you should already start seeing the products you defined in the configuration file.
Test Different Payment Scenarios
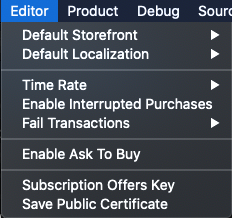
Now, we can start to see the benefits of the StoreKit configuration files. There are different configuration options to test payment scenarios such as Interrupted Purchases, Deferred Purchases, or refunds. You can see all these options from the Editor menu while the configuration file is selected in the Xcode.
Enable Interrupted Purchases
This option will cause all transactions to be failed and stay in the pending state so that it is possible to resolve it from the Manage Transactions menu. Unlike the interrupted purchase option from App Store Connect, this option does not show any popup that interrupts the payment but fails the transaction directly. This scenario already provides what we want to achieve since we can resolve the failed purchase later to succeed.
Enable Ask to Buy
It is possible to get a payment request popup with this option. Your game will show an extra popup to request the purchase from parents, which will create a pending transaction. This pending transaction can be approved or declined from the Transaction Manager. Therefore, you will be able to achieve the whole flow of the deferred purchases.
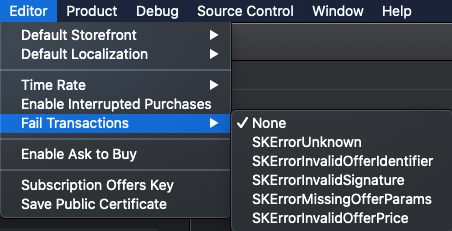
Fail Transactions
This menu allows you to select specific error types. If you choose any option other than None, your transactions will fail with the error you selected.
Time Rate
It is possible to select the desired time rate that you want. There are different options such as real-time, one hour is one day, one minute is one day, or one second is one day.
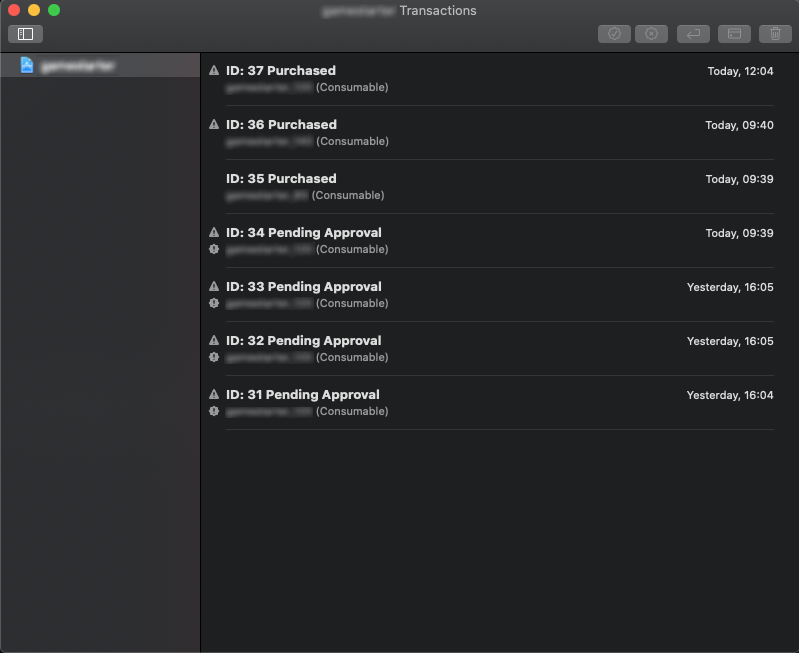
Manage Transactions
You can see all the transactions that you created from Debug → StoreKit → Manage Transactions menu. Moreover, it is possible to
- resolve pending transactions to simulate Interrupted Purchases
- approve/ decline deferred transactions to simulate Ask to Buy feature
- refund purchases
Disable StoreKit Testing in Xcode
Suppose you want to disable the local testing and start using App Store Connect for in-app purchases again. In that case, you need to change the StoreKit Configuration file to None by editing the scheme and following the Run → Options menu. After this, your app will continue to connect to App Store Connect for in-app purchases.
Conclusion
Before wrapping up the topic, it is important to mention that Testing StoreKit in iOS requires Xcode 12 or later on macOS 10.15 or later. If you want to test your purchases on iPhone simulators, only iOS 14 or later versions support StoreKit configuration files.
Testing in-app purchases using the Apple sandbox environment might not always be smooth and can cause blocker situations from time to time. I believe, setting up the local configuration file for StoreKit can speed up testing in-app purchase flows and improve productivity. Of course, I can suggest you test one more time with the Sandbox environment once you think that your in-app purchases are stable enough.
With this blog, I tried to explain steps to set up local test configurations and test some specific payment scenarios. I hope this post will be helpful for you.
InnoGames is hiring! Check out open positions and join our awesome international team in Hamburg at the certified Great Place to Work®.